

 en
 English
 русский
 Español
 عربى



Cutting PVC Pipes: The Right Tools and Techniques for Clean, Square Cuts
Industry News-Content
Cutting PVC pipe is not a one-tool job. If you use the same method for a 20 mm electrical conduit and a 110 mm drainpipe, you will either work too slowly or end up with a crooked cut that leaks. The first thing to check is the pipe's outer diameter and wall thickness. A thin-walled conduit will collapse if you clamp it too hard, while a thick drainage pipe needs a blade that can handle the mass. Here is the short version: a ratchet cutter is fastest for small diameters up to about 63 mm, a hacksaw remains the most reliable fallback, and for large drainpipes you need a low-speed saw with a fine blade. The right choice depends on pipe diameter, wall thickness, workspace, and whether the cut will be solvent-welded.
Why the cut quality determines the joint quality
PVC solvent cement works by softening the pipe surface and fusing it to the fitting. A rough or angled cut leaves gaps that reduce contact area and weaken the bond. For drainage systems, a cut that is off-square by more than about 1.5 mm on a DN110 pipe can lead to a visible gap after insertion, which becomes a leak path under hydrostatic pressure. The same principle applies to smaller diameter pipes: an angled cut on a 50 mm drainpipe may still seal, but it reduces the insertion depth and increases stress at the joint.
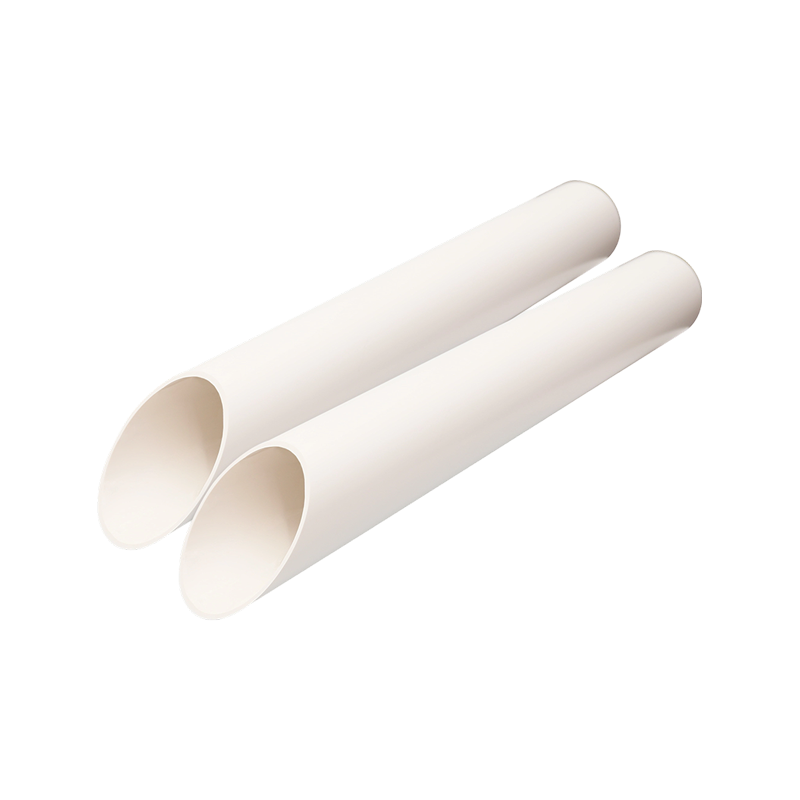 PVC Standard Drain-Pipe for Accurate CuttingThis standard drain pipe, available in 40–315 mm diameters, ensures precise cuts and square ends for solvent cement joints, reducing leak risks in drainage systems.View Product →
Cutting quality also affects the socket fit. Fittings are molded with a specific tolerance for the pipe outer diameter. When the pipe end is left with burrs or a lip, the insertion effort increases, and the solvent cement may get scraped off before the joint is assembled. This is why the first step to a leak-free PVC system is a clean, square cut.
In rain water leaders, a poorly cut pipe creates a rough interior that catches leaves and debris, increasing maintenance calls. The cross-section also matters for flow: a burr that reduces the inside diameter by even 1 mm on a 50 mm pipe can lower the discharge area by roughly 4%. A well-made PVC drainage pipe starts with tight wall thickness and a smooth surface. For projects where the pipe will be solvent-welded, the cutting method and the pipe quality work together.
Cutting tools compared
Each tool has a clear place in the installation process. The table below summarizes the trade-offs so you can match the tool to the pipe size and the job.
| Tool | Best for | Speed | Cut quality | Watch out |
|---|---|---|---|---|
| Ratchet cutter | Small pipe up to 63 mm | Fast | Clean and square | Needs space to swing |
| Hacksaw | All sizes | Slow | Good if guided | Blade can wander |
| Cable saw | Tight or overhead cuts | Moderate | Rough | Requires two hands |
| Wheel cutter | Thin wall pipe | Moderate | Clean | Can deform if forced |
| Low-speed circular saw | Large drainpipe | Fast | Clean, but needs deburring | Dust and noise |
For most residential drainage work, a ratchet cutter is the best first choice for pipe up to 50 mm and even 63 mm, because it makes a single clean cut with no burrs. The blade design works like a lever: each click advances the cutting wheel, and the force stays perpendicular to the pipe axis. A hacksaw is slower but works everywhere, and if you keep the blade perpendicular, it will produce a square cut. Use a 24 TPI blade for thin wall conduit and a 14 TPI blade for thick drainage pipe. For large diameter pipe, such as 110 mm or 160 mm, a low-speed hand saw or a power saw with a fine-tooth blade is more practical. If you use a power saw, set the speed below 1,000 RPM to avoid melting the PVC. Avoid using a high-speed abrasive disc: it melts the PVC, creates a rough edge, and can leave a burnt surface that the solvent cement cannot bond to.
For electrical conduit, the wall is thinner and the pipe is often cut in bundles. A ratchet cutter or a sharp utility knife can work, but a cutter designed for thin-wall conduit gives the cleanest edge. Our standard PVC conduit is made with a consistent wall thickness, so the cut edge stays smooth even when you trim multiple pieces on site.
 Type 215/315/415 PVC Electrical Conduit PipeWith consistent wall thickness, this conduit allows smooth, clean cuts even in bundles, making it a practical choice for electrical installations that require precise trimming.View Product →
Step-by-step: cutting PVC pipe cleanly
- Measure and mark the cut line.
- Secure the pipe without crushing it.
- Cut along the line while keeping the blade square.
- Deburr the cut end with a utility knife or sandpaper.
- Chamfer the outer edge for solvent welding.
Use a tape measure and a marker, and wrap the mark all the way around the pipe so it is visible from both sides. A carpenter's square helps you draw a straight line. If you are cutting close to an existing fitting, measure from the face of the fitting and allow for the insertion depth before the cut.
Then support the pipe with a pipe clamp or a V-block. Do not crush it with a bench vise, because PVC can deform and create an oval end. A soft jaw or a strip of rubber protects the surface. When cutting, let the tool do the work. With a hacksaw, use the full blade length and cut on the return stroke. With a ratchet cutter, close the jaws slowly and tighten between clicks so the blade does not tear the plastic. For a power saw, use a support board underneath and feed the saw gently; do not push the pipe into the blade manually.
After the cut, a quick pass with a deburring tool removes the sharp lip. A knife or a piece of sandpaper works on small sizes. On larger pipe, a round rasp is faster. Chamfering is especially important for solvent-welded joints: the small 45-degree edge lets the pipe slide into the fitting without pushing solvent cement off the surface. The chamfer should be about 0.5 to 1.5 mm by 45 degrees, which is enough to guide the pipe without removing much wall.
After the cut: deburring, chamfering, and solvent welding
The cut end is never ready for solvent cement immediately. Burrs left on the inside will restrict flow, and burrs on the outside will interfere with the fitting. Remove all loose material with a knife or 120-grit sandpaper. Then test-fit the pipe into the fitting. It should go in about one third of the socket depth without binding. The gap you feel tells you whether the chamfer is sufficient. In a dry-fit, you should not see daylight through the joint. Apply solvent cement to both the pipe end and the inside of the fitting, rotate the pipe a quarter turn, and hold it in place for 15 to 30 seconds. Always use a cement labeled for the pipe material you are cutting. For PVC-U drain systems, a specific PVC adhesive creates a chemical bond. After welding, allow the joint to cure for the time specified on the container before pressure testing.
 PVC Adhesive for Solvent Cement JointsDesigned for PVC bonding, this adhesive cures quickly and resists weather and aging, ensuring secure connections for pipe systems after proper cut preparation.View Product →
Safety and procurement considerations
Safety starts before you cut. Wear safety glasses to protect against flying chips. If you are using a hacksaw, keep the blade tensioned and avoid bending it. For power saws, use a dust mask and keep hands away from the blade. In tight spaces, a cable saw or a ratchet cutter is safer than a knife or an open blade. PVC solvent cement contains volatile compounds, so work in a ventilated area and close the can between uses.
When buying PVC pipe, the biggest risk is wall thickness, not outer diameter. A pipe labeled DN110 may be sold in different pressure grades, and the wall thickness affects both the pressure rating and the rigidity. If you are buying in bulk, ask for a coupon sample and check the inner diameter with a caliper. Also check that the pipe has a smooth, glossy surface without bubbles or color streaks. A uniform wall is the foundation for a clean cut and a reliable joint. You can browse the full product range to compare available sizes and wall structures. If you are weighing PVC against other materials, this PVC pipe types guide explains the differences between PVC-U, CPVC, and PVCO.
Whatever pipe size you are cutting, the same rule applies: respect the material, use the right tool, and finish the cut before you start gluing. A few extra seconds of chamfering can save months of hidden leaks.
Our Product //
Recommend Products



 +86-13801995968
 +86-18017886575

 No. 366, Lane 6995, Puxing Road, Fengxian District, Shanghai
Copyright © SHANGHAI PILSA PIPE INDUSTRY CO., LTD. All rights reserved.

